
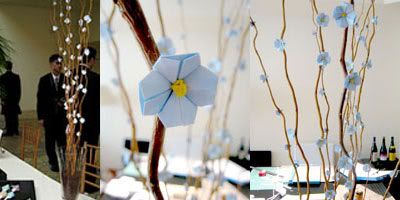
Yeah! well I had a hard time trying to figure how to finish this flowers. So after I finally did I had to teach everyone in person so they could help me (MOH, Sister, Mamá Poodle and more) because they could not finish the last steps on this tutorial (Link) That for I thought I would be really helpful if I could add more pictures to the 1.0 version of the blossom tutorial and I came out with this next version (Basically the same but I added some more pictures and details).
So to make things easier I draw a "star", a "heart" and two lines on each corner, all of them in different colors, so that way If you draw and replace the colors I used ( Purple, Green, Pink and blue) you can follow this instructions in a better way.
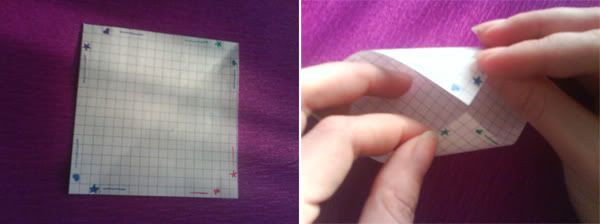 1. Start with a square of paper and fold in half from corner to corner
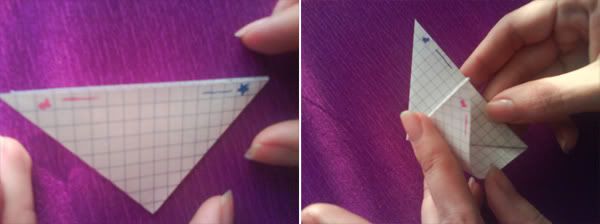 2. Then fold again from corner to corner making a small triangle
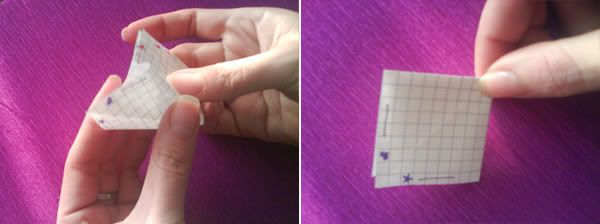 3. Partially unfold from one corner, take the point from the far side of the triangle and fold it downwards to the top point, like in the picture the "purple" goes to the "pink"
 4. Flatten down into a square like this, then flip over and repeat on other side.
 5. This is what you have to end up with, on the left you an see it unfolded and folded on the right.
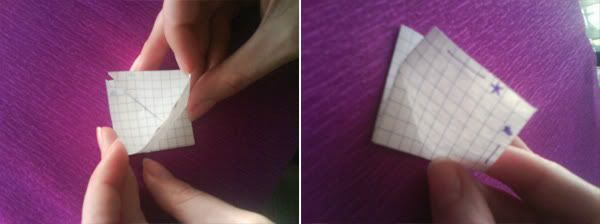 6. Now take the tip of the square (the heart and star) and lift it away from the base, like in the right picture
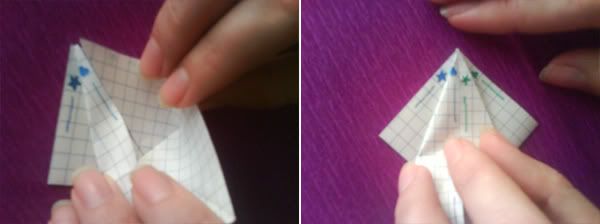 7. Now you need to fold the "heart" to the center line, and repeat the same with the "star" like in the pictures above.
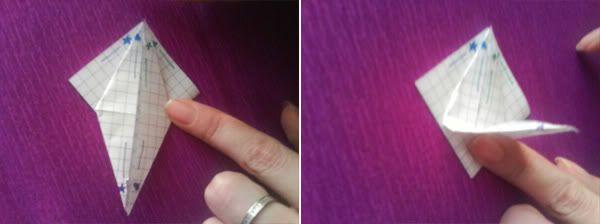 8. Flatten down like in the above picture.
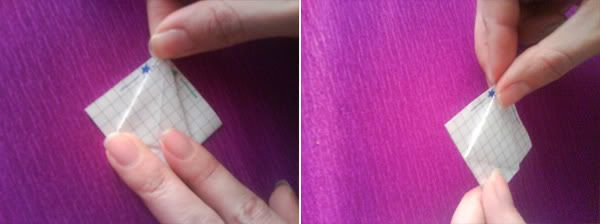 9. Now you can lift back that side and "hide" the star and heart.
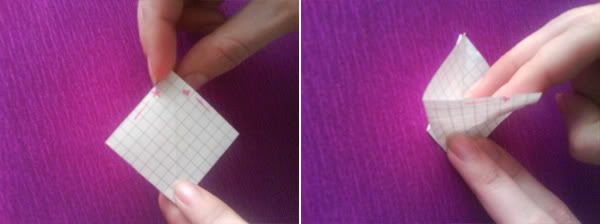 10. Now you need to turn to the other side and form step 7 all over again.
 11. here you can see me doing number 7 again
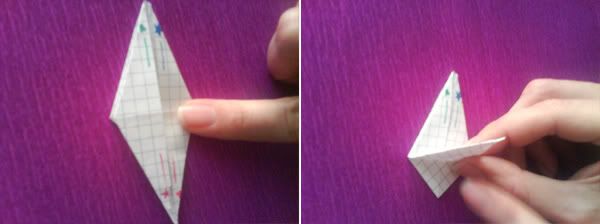 12. And now number 9, now I have both sides looking the same.
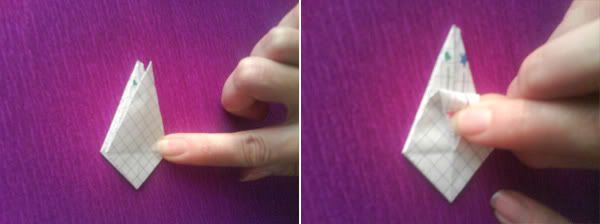 13. Now you need to take the tip with the star and heart and fold it back to leave a mark.
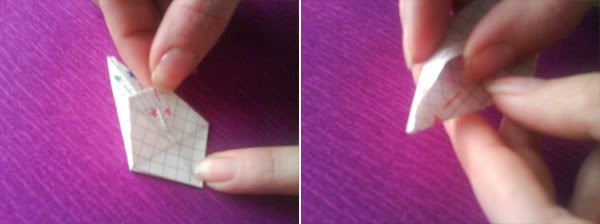 14. Now using that mark you need to unfold the pedal and turn the star and heart "inside" like in the picture.
 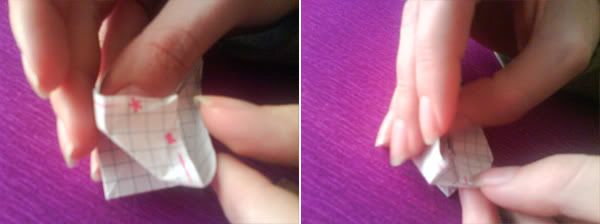 15. Here you can see me unfolding and folding the pedal "inside"
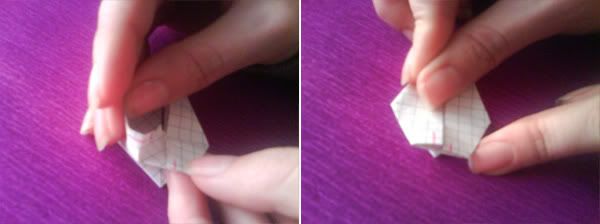 16. This is how it should look at the end, 3 more to go!
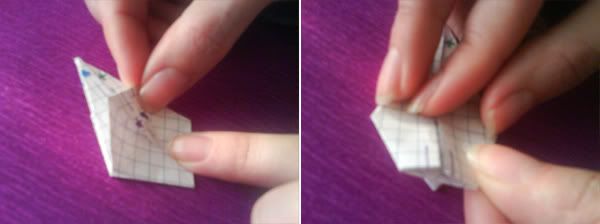 17. Now repeat the process with the other 3 points (the ones that have hearts and stars).
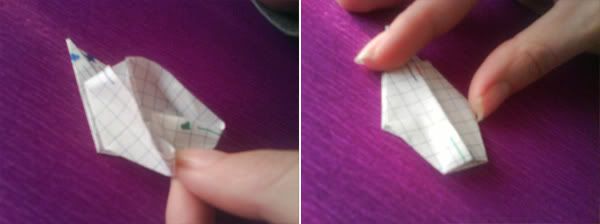 18. Again after making the folding line unfold the pedal and turn "inside" the heart and star.
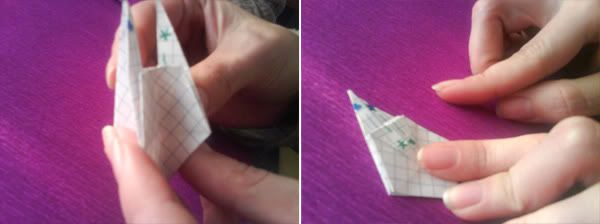 19. This is how it looks with 2 of them done, lets go for the 3rd one!
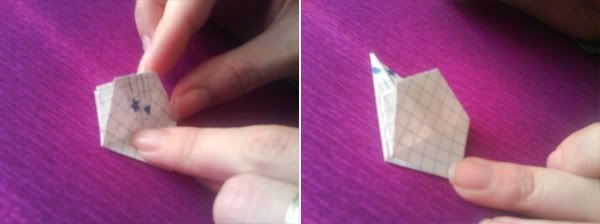 20. The 3rd one ready.
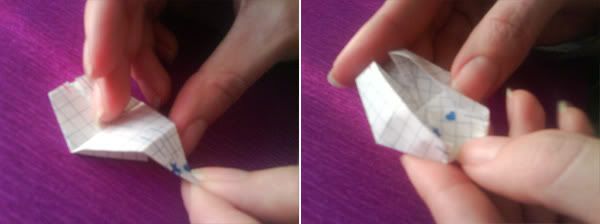 21. Finally the last one.
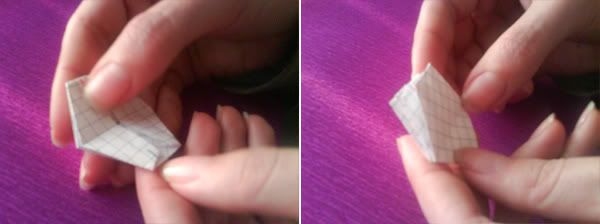 22. This is the end result after doing the 4 of them.
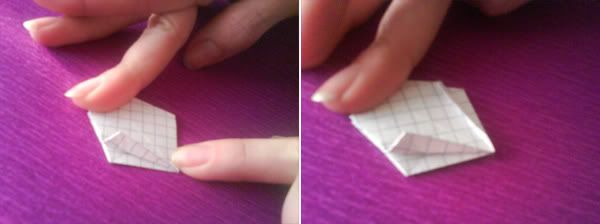 23. Take one of the outer corners and fold it towards the center line, remember that this is the bottom center of our flower (all the ones we folded are in the opposite side)
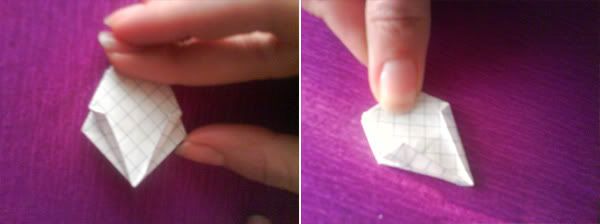 24. It should look like this. Repeat on the half of this petal, then repeat both folds on the backside.
 25. Hold the flower and gently separate the petals in an outward direction.
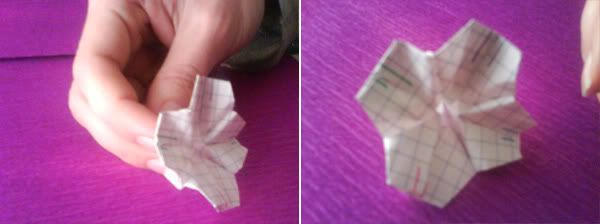 26. It should look like this with all 4 petals completed
Remember:
"To create the center of your flower you need to cut a small piece of crepe paper twice as long as you want the center to be, gently twist a couple of times in the center, old crepe paper in half and gently insert into the center of the flower. I use a bit of glue on the folded point to secure in the flower and a small nail or wire to ease the crepe paper lower into the base." From (Link)
Hope this time you could follow along and complete every step! :) I'm really happy about the feedback and to know that so many brides are thinking about this option for their centerpieces.
Happy fold!


The flowers looks pretty! It seems like a lot of steps but i'm going to try it out :) Love origami!
ReplyDelete